I. Love. Birds. I love watching them in the wild, learning their calls, looking at pictures, and hearing about bird encounters. I find such simple pleasure just closing my eyes and listening to the bird cacophony around my home, identifying those I know and appreciating those I don't. Just outside my window, I have created a mini feeding station among some pine trees where my kitty and I can watch for hours. Yesterday, within the span of an hour, I had eight different types of birds visit! :) It makes me so happy to have given these visitors a safe place to eat and mate and drink. It's a source of much joy.
For birdwatching on the Web, there are some incredible sites out there for bird and nature lovers. Here are my go-to sites for getting a birdy fix.
Websites and Facebook Pages:
"All About Birds": Cornell Lab of Ornithology
Warblers Call
WeLoveBirds.org
Outside My Window: WQED Bird Blog
Birds & Blooms Magazine
Favorite Live Cams:
Phoebe, a Hummingbird Nest Cam
Bald Eagle Nest
Falcon Cam in Pittsburgh
Great Blue Heron Nest
DIY Birding:
Make Your Own Feeders
Bird Photography Tips
Tips for a Bird-Friendly Backyard
Best Backyard Bird-Feeding Practices
Get Involved:
Pennsylvania eBird
Participate in NestWatch
Great Backyard Bird Count
Create a Certified Wildlife Habitat
Showing posts with label DIY. Show all posts
Showing posts with label DIY. Show all posts
10 April 2012
09 April 2012
Handmade Bliss: Lil Fish Studios
 Lisa Jordan of Lil Fish Studios is an artisan inspired by the earth and nature, texture, sustainability and the beauty in simplicity. Her lovingly felted textural embroidered stones and tiny felted landscape brooches soothe my spirit and evoke a quiet joy in my heart, as do the thoughts and observations featured on her blog. Whether sharing about growing, baking, family or creating, Lisa relishes in the small pleasures of the every day, reminding me to dwell in the tiniest of happinesses. It is our shared love of feeding the soul and DIY living that led me to follow her on the web, where I find her Facebook page and blog (I love her tutorials and her experiments with natural dyes) a source of wonderful daily inspiration.
 Lil Fish Studio's work led me to stumble upon her via Etsy (she now sells mostly on Big Cartel). I was instantly charmed by her designs, which are beauteous, sweet, and evocative of a true appreciation of the expressions of life.


Labels:
DIY,
felted,
handmade,
lil fish studios,
lisa jordan,
nature,
stones,
sustainable
02 April 2012
Projects I'd Love to Make: In the Garden
With the early warmth and sunshine this year, everything is growing already! Thus, my gardening lust has begun just as early. :) With the need to wait until May to throw myself into planting flowers and veggies, I am indulging in planning fun garden projects instead. Here are some of the DIYs we are either planning or fantasizing about for this year:
PLANNING: We've got all of the materials for the pots below, and are on the hunt for some good pallets! :)


THINKING ABOUT IT:


FANTASIZING:

PLANNING: We've got all of the materials for the pots below, and are on the hunt for some good pallets! :)


THINKING ABOUT IT:


FANTASIZING:

21 March 2012
Joy In the Little Things
Joy is making your own, with the help of the warm spring sunshine.

Making hibiscus sun tea.

Drying oregano from the garden.
Joy is hyacinths in three colors, heavy with sweet, musky scent.


Joy is noticing an explosion of sprouts of my favorite flower, Lily of the Valley- can't wait until they bloom!


Baby Clematis reaching skyward.

Making hibiscus sun tea.

Drying oregano from the garden.
Joy is hyacinths in three colors, heavy with sweet, musky scent.


Joy is noticing an explosion of sprouts of my favorite flower, Lily of the Valley- can't wait until they bloom!


Baby Clematis reaching skyward.
Labels:
botanical garden,
DIY,
Etsy Pittsburgh Team,
herbs,
home decor,
joy
19 March 2012
Newest Crafty Haul
Stopped by Creative Reuse Pittsburgh and Wild Stuff Pop-Up Vintage Sale this weekend, and walked away with a haul of new fabrics and fun stuff! Hoping it all will kick my inspiration in the arse and get me in creating mode for the coming indie craft market season! :)

Feathers, leaves, florals, and some great fabrics for dyeing fun colors. :) Also random sewing bits to jazz up bags and pouches.

Vintage wooden thread spools to complete a sweet little project on my list from Minature Rhino.

Feathers, leaves, florals, and some great fabrics for dyeing fun colors. :) Also random sewing bits to jazz up bags and pouches.

Vintage wooden thread spools to complete a sweet little project on my list from Minature Rhino.
Labels:
craft projects,
DIY,
local handmade,
reuse,
supplies,
upcycle,
vintage linens and lace
19 September 2011
Curtains- My First Machine Project!
My first real sewing project- kitchen curtains made from vintage fabric in a bright pattern of veggies and pansies, which I found at Creative Reuse Pittsburgh.
I thought the vibrant colors of the fabric were much too loud on the white background of the original fabric, so I put my new tea-dye skills to work! After washing and drying the material, I dropped it into a lighter tea using only half of the tea bags as in my previous dye sessions, letting the fabric soak half the time. The results are perfect, dulling the colors a bit and giving the white background a slightly worn look. They work great in my kitchen, which I prefer mostly neutral with little pops of color in towels and cookware/dishware (I love reds).

As a brand newbie sewer, I have to admit that I find the measuring and cutting of the fabric is much more difficult than the sewing part and figuring out the machine! I feel pretty good about my machine work during the project, actually, and ran into only a few challenges: thread coming out of the needle while sewing, keeping a totally straight seam line, and finding my stitches were very loose. My Mom helped me figure out that I was threading the machine slightly wrong and that I needed to increase the machine tension to make my stitches tighter.
So how'd they turn out? You judge for yourself! Some slightly lopsided seams, a few loose stitches, but overall I am quite happy!

I thought the vibrant colors of the fabric were much too loud on the white background of the original fabric, so I put my new tea-dye skills to work! After washing and drying the material, I dropped it into a lighter tea using only half of the tea bags as in my previous dye sessions, letting the fabric soak half the time. The results are perfect, dulling the colors a bit and giving the white background a slightly worn look. They work great in my kitchen, which I prefer mostly neutral with little pops of color in towels and cookware/dishware (I love reds).

As a brand newbie sewer, I have to admit that I find the measuring and cutting of the fabric is much more difficult than the sewing part and figuring out the machine! I feel pretty good about my machine work during the project, actually, and ran into only a few challenges: thread coming out of the needle while sewing, keeping a totally straight seam line, and finding my stitches were very loose. My Mom helped me figure out that I was threading the machine slightly wrong and that I needed to increase the machine tension to make my stitches tighter.
So how'd they turn out? You judge for yourself! Some slightly lopsided seams, a few loose stitches, but overall I am quite happy!

17 September 2011
Things I am Loving... Concrete!
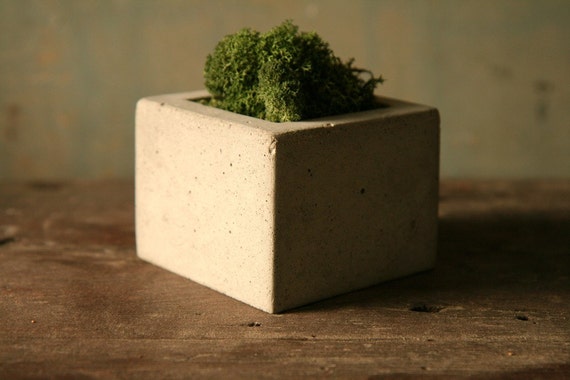
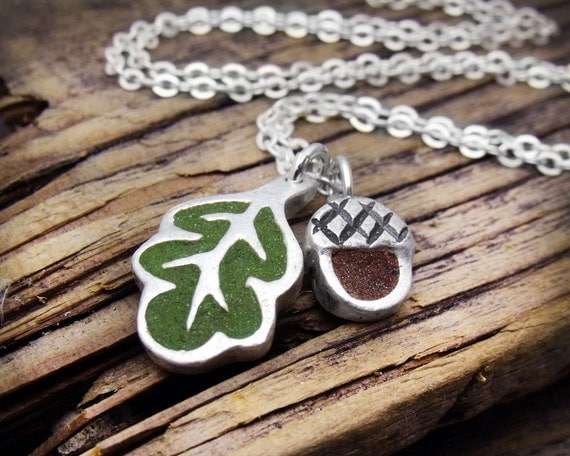
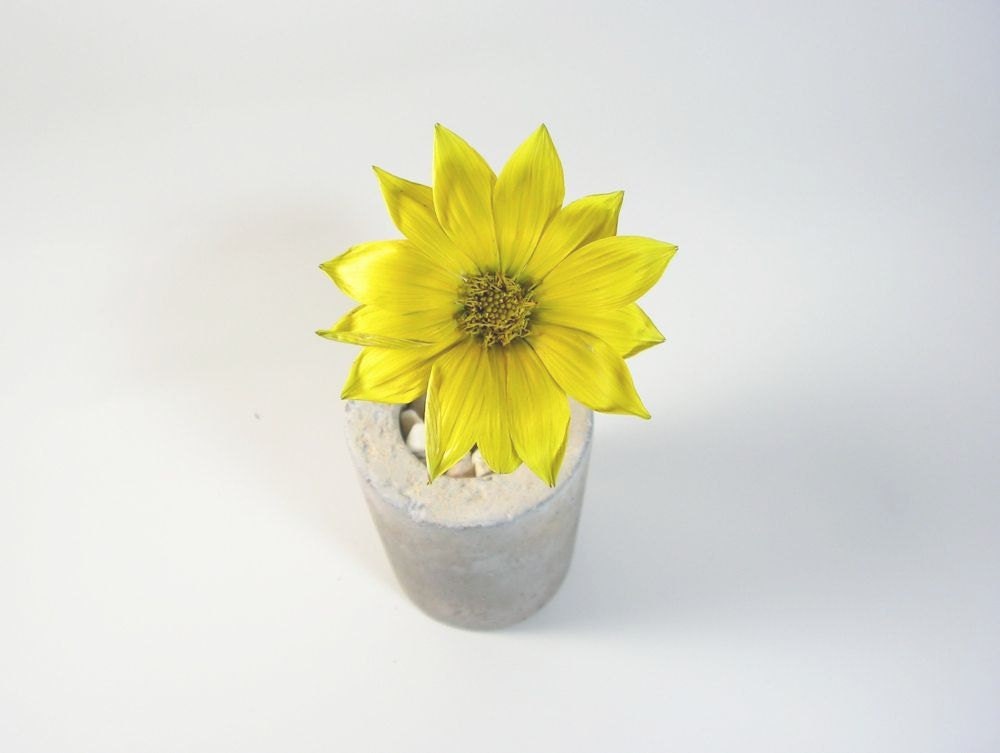
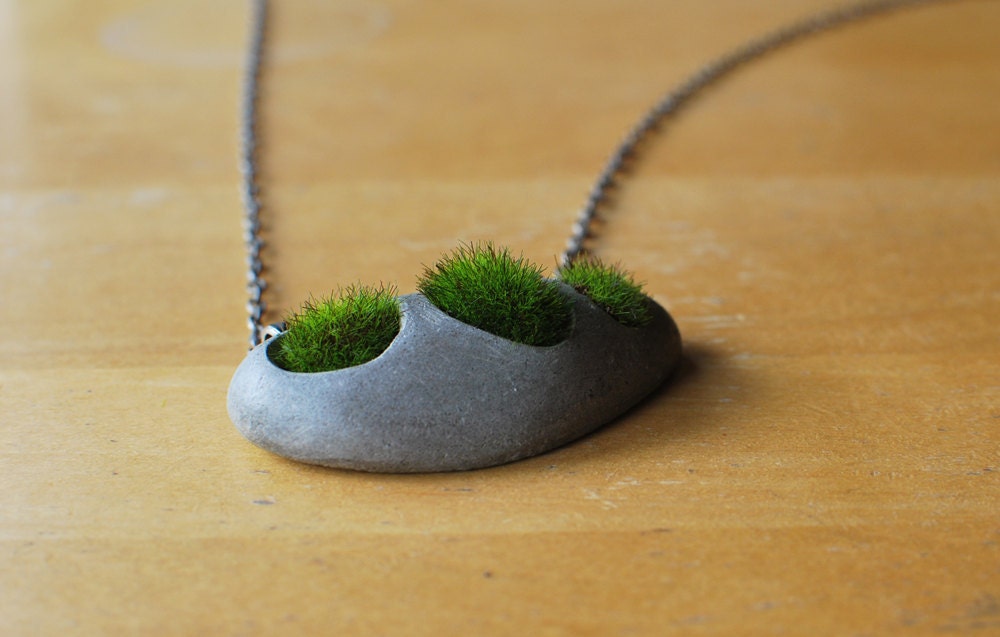
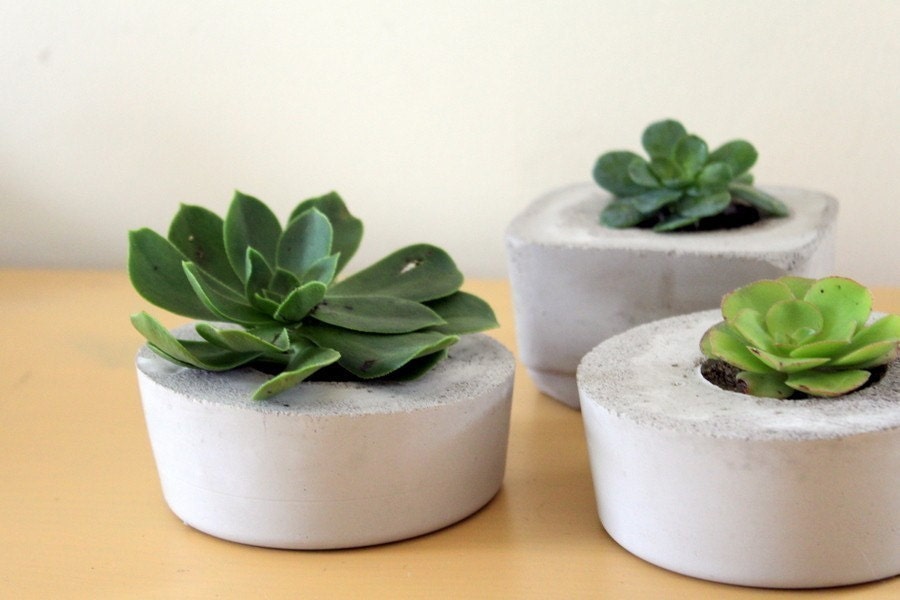
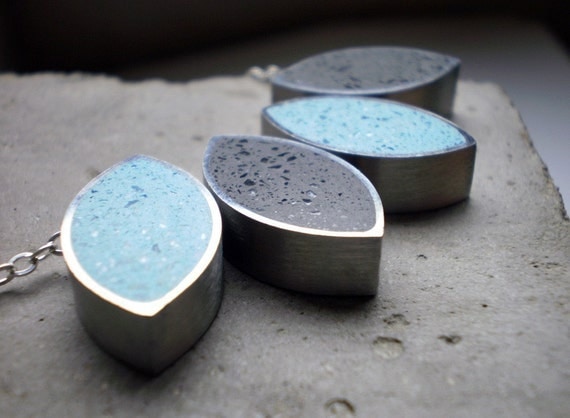
On Etsy, I have been very drawn to amazing things made with concrete, really noticing and appreciating the unique properties of the material when used in creating. Simple. Rustic. Awesome. Here are a few of my favorite concrete-based creations on Etsy, followed by a couple of great tutorials on how to make your own "concrete" planters!
Square . Concrete . Pot:
Oak Leaf and Acorn Necklace:
Slim Industrial Rustic Concrete Vase / Holder:
Grassy Pebble: Concrete and Faux Grass Necklace:
Indoor/Outdoor and Awesome Concrete Planter -Circle:
Electric Blue Bib and Gray Bib Necklace:
TUTORIALS
Great DIY projects for your fantastic concrete planters!
Making Hypertufa Pots
How to Make Modern Cement Planters Using Packaging

Square . Concrete . Pot:

Oak Leaf and Acorn Necklace:

Slim Industrial Rustic Concrete Vase / Holder:

Grassy Pebble: Concrete and Faux Grass Necklace:

Indoor/Outdoor and Awesome Concrete Planter -Circle:

Electric Blue Bib and Gray Bib Necklace:

TUTORIALS
Great DIY projects for your fantastic concrete planters!
Making Hypertufa Pots
How to Make Modern Cement Planters Using Packaging

Labels:
concrete,
craft projects,
DIY,
Etsy,
home decor,
hypertufa
05 September 2011
Projects I'd Love to Make: All Lacey and Pretty
I have been in love with old lace and linens since sometime last year. I love the look of aged doilies and lace mixed in with more modern lines and styles. I would love to try these projects!


Here are more ideas of doily-inspired projects:
DIY with Vintage Doilies
Doily Crafts & DIY Roundup
Many of my dream project ideas come from the Craftzine Blog.


Here are more ideas of doily-inspired projects:
DIY with Vintage Doilies
Doily Crafts & DIY Roundup
Many of my dream project ideas come from the Craftzine Blog.
Labels:
craft projects,
DIY,
linens and lace,
tutorials,
vintage
16 August 2011
Projects I'd love to Make: Awesome Ways to Salvage Earthy and Thrifty Finds
Sharing more amazing projects I would love to try my hand at! These three DIY ventures involve making found and thrifted objects into fantastic treasures!


Labels:
craft projects,
DIY,
eco-friendly crafts,
furniture,
natural,
thrift store,
vintage
12 August 2011
DIY: Tea Dye Fabric for An Antique Look
 On my DIY project list has been trying out tea dyeing on some white clothing I have. I love the look of aged fabrics and laces, and tested out tea dyeing a few weeks ago on a few bits of vintage lace. As I didn't have much tea, the concentration of the liquid wasn't strong enough to tint the laces much. So I purchased a mega amount of tea bags to prepare to dye the sweater, top, and dress I had set aside for the project. After some research online about dyeing with tea, I came up with a plan. Here's what happened!
How to Tea Dye
NOTES:
1) Tea only works when dyeing natural fabrics like cotton, silk, and some wools. It does NOT work on synthetic fabrics like polyester.
 2) Dyeing with tea will give your clothing/materials a beautiful brownish-reddish color that you control by how long you leave them in the tea solution. Tea dye does NOT result in creamy or beige tones, so if you are looking for this, it's best to find a clothing dye in the color you desire. Tea dye does not always result in a completely even color result. A clothing dye is best used to achieve this.
3) It's very difficult to impossible to replicate colors using different batches of tea dye. If you need to create large amounts of matching fabric or need two pieces of clothing to match exactly, make enough tea with one batch to dye everything.
DYE PROCESS
1) Before starting dye preparation, soak garments or materials to be dyed in cool water. Damp fabric takes the dye much more evenly and richly. Keep items in water until ready to dye.
 4) Create your dye. For every yard of fabric, use 4 cups of water and 8 tea bags (loose tea is a no-no).
Any brand of basic black tea will work, even the generic. I purchased plain black Tetley tea bags in a huge box of 100 bags.
It is best to use a stainless steel or glass container to create your dye in, such as a large pot or large, heavy glass bowl. I know someone who uses their laundry or kitchen sink, too. Just be cautious about staining. ;) I used a large soup pot, which I both boiled my water in and dyed in. Two of the three garments I stained fit well at one time.
Calculate the number of tea bags you will use, and remove the paper tags from the strings each. Bring water to boil, remove from heat, pour water into container you will be using, and add tea bags (sans tags).
Steep your tea for at least five minutes, or longer if you wish to have a deeper color result. I steeped the tea in this project for 10 minutes. When desired richness of tea solution is reached, use a slotted spoon to remove all bags. Depending on the quality of your bags and how easily they tear, it may be okay to squeeze the liquid from the tea bags upon removal. I used my hands for this, which was dumb and difficult cause the bags were super hot! lol Another large spoon will work better, I think.
 5) Dye. Once your tea is free of bags, remove your garments to be dyed from the water they are soaking in. Squeeze well, removing as much excess water as possible so as not to dilute your tea. Place garments in hot tea and stir.
If your desired color result is a more even, smooth tone, add clothes to the tea as loosely as possible. Stir and swish in the tea at regular intervals while soaking. If you are looking for a more uneven, mottled, or tie-dye result, you may want to leave clothes a little more tightly bundled when you add them to the tea and stir or agitate minimally, if at all.
Soaking time is totally dependent on your desired color intensity. A 30-minute dye time seems to result in a softer, more subtle color. I left mine in the tea for just over an hour for a darker, richer tone. NOTE: The color of your garment will be lighter after drying, so you might want to dye to a slightly darker tone than you desire ultimately.
Keep in mind that different fabrics and textures will take the color differently. I dyed a 100% cotton crochet sweater that ended up a more subtle version of the deeper peachy color that the 100% cotton jersey-ish knit top turned. Both were dyed together and for the same length of time.
7) Check color. Once you are happy with the color you see on your fabrics, remove clothing from tea (preferably close to a sink, and don't dump tea down the drain yet!) and rinse in cool water until water runs mostly clear. A lot of tea will rinse away, but there should be sufficient color left in the fabric. If your color appears lighter than you'd hoped, squeeze as much liquid out of your garment(s) as you can, and drop into dye for a longer soak. Depending on how long your tea sat after boiling, it may be necessary to reheat to at least steaming before dyeing again.
MY RESULTS? A unique, beautiful peachy-tan-rusty color that I just love! See more photos at the bottom of the article. :)

 ***WARNING: One thing I failed to find in my research into tea dyeing fabrics is that perspiration in clothing turns darker than the rest of the garment when dyed! Ack! Maybe that would seem common sense, but having no dyeing experience, it never occurred to me! :P I dyed a white cotton dress with almost imperceptible perspiration stains under the arms, and though the body of the dress turned out lovely, the under arm area turned 3 times as dark! Looks like I will need to dye with a clothing dye that is much darker. LOL
6) Post-dye. So, do you love the results of your tea dyeing? :) If so, there are a couple of things you can do to set the color. Take your pick.
*Toss in the dryer. I dried the knit top and crocheted sweater right after dyeing, using a medium setting for knits with good result. If you're worried about leaving in the dryer for too long, try drying for just 10 minutes on a lower setting (i.e., not "high"). Finish by pressing with a hot iron.
*Wash items on a gentle cycle in cold water. I did this with one dress, and the color maintained and set beautifully. Let air dry (my choice to both preserve clothing and use less energy) or tumble dry on low.
* Upon removing clothing from dye, drop into a mixture of water and vinegar. Use 1/2 c vinegar for every cup of water. Allow to soak for 15 minutes, then rinse well. I was a bit leary of having clothes that smelled like vinegar, so I did not try this method.
If you are not happy with the results, as the tea may be dyed out with some type of bleach. Just keep in mind that older fabrics and laces may be too fragile to withstand bleaching and repeated washing.


Labels:
antique,
clothing,
craft projects,
DIY,
eco-friendly,
fabric,
tea dye,
vintage
03 August 2011
Projects I'd LOVE to Make- Gorgeous, Eco-friendly, and Garden-Inspired
I came across these two amazing, earthy-green projects via the Craftzine.com blog. I'd love to make both! :) Already raved about these elsewhere, but loved them so much, here I am doing it again!


Labels:
craft projects,
DIY,
eco-friendly crafts,
garden
01 August 2011
DIY: Vintage Fabrics & Trim Tote
Inspired by my ever-growing stash of vintage and antique fabric, trim, and buttons, a love for shabby chic, and a recent Etsy search for a newhttp://www.blogger.com/img/blank.gif bag, I took an old tote and made it new (for me) and fun!
I started with a plain cotton tote silk-screened on one side that we used for grocery shopping. I scavenged through my fabric pile and came across a piece of green and cream vintage toile with a lovely country scene (thanks to a purchase from the incredible Red Stripe Vintage on Etsy). I hand-stitched it over the side of the tote with the silk-screened image and added bits of lace and fabric scraps. Some antique buttons and stitched in green thread around some of the images on the toile were nhttp://www.blogger.com/img/blank.gifext. Lastly, sewed a pocket on the inside!http://www.blogger.com/img/blank.gif
Here's the result!


I am not a sewer in that I have no machine and I don't have much skill, whether using machine or hand. Using an old tote not only solved having to make an entire bag from scratch, but recycled an old bag and made the project even more eco-friendly. My messy hand sewing skills worked perfectly with the shabby chic style. I have been making a LOT of jokes about my sewing- it's probably getting old. ;)
I used my bag the other day for the first time, and got some interest from people wanting their own. Please get in touch if you want to send me an old tote- I'd be happy to do a custom project for you!
And here are some other DIY fabric projects I've come across that I would love to do with a machine (a friend promised to give me an extra) and practice! They are just too sweet not to share! :)
Vintage House Dress to Summer Smock
Summer Skirt & Market Bags
One-Hour Skirt
I started with a plain cotton tote silk-screened on one side that we used for grocery shopping. I scavenged through my fabric pile and came across a piece of green and cream vintage toile with a lovely country scene (thanks to a purchase from the incredible Red Stripe Vintage on Etsy). I hand-stitched it over the side of the tote with the silk-screened image and added bits of lace and fabric scraps. Some antique buttons and stitched in green thread around some of the images on the toile were nhttp://www.blogger.com/img/blank.gifext. Lastly, sewed a pocket on the inside!http://www.blogger.com/img/blank.gif
Here's the result!


I am not a sewer in that I have no machine and I don't have much skill, whether using machine or hand. Using an old tote not only solved having to make an entire bag from scratch, but recycled an old bag and made the project even more eco-friendly. My messy hand sewing skills worked perfectly with the shabby chic style. I have been making a LOT of jokes about my sewing- it's probably getting old. ;)
I used my bag the other day for the first time, and got some interest from people wanting their own. Please get in touch if you want to send me an old tote- I'd be happy to do a custom project for you!
And here are some other DIY fabric projects I've come across that I would love to do with a machine (a friend promised to give me an extra) and practice! They are just too sweet not to share! :)
Vintage House Dress to Summer Smock
Summer Skirt & Market Bags
One-Hour Skirt
Labels:
craft projects,
DIY,
shabby chic,
upcycled,
vintage
Subscribe to:
Posts (Atom)

